

Why it’s vital to send meeting invitation responses
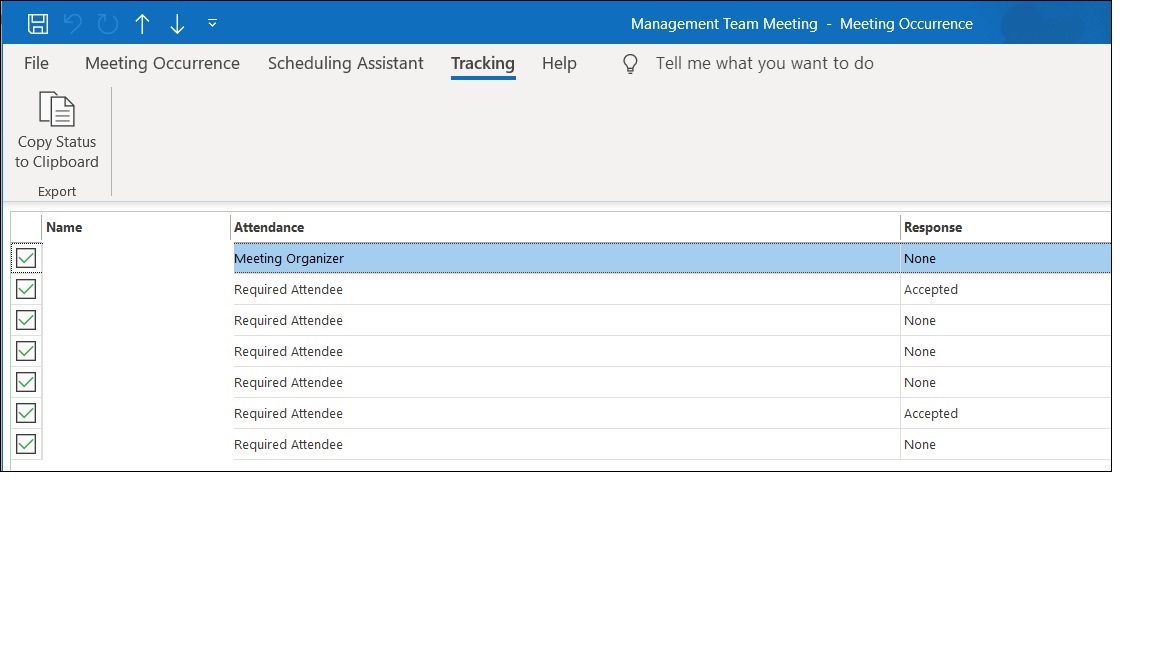
If you are a meeting organiser, you need to know who is coming to your meetings. This information is available in the Outlook’s Meeting Tracking tab.
The Tracking tab relies on your invitees remembering to send an email response. If they simply mark the invitation as Accepted, Tentative or Declined, the Tracking response will show as ‘None’.
Think about it for a moment. If I invited you to a party and all you did was mark it in your own calendar, I wouldn’t know if you were coming. So I wouldn’t bake a cake.
In a workplace setting, the failure to send an email reply is potentially more irritating as it’s time, not cake that’s at stake. Meeting organisers waste precious time trying to work out who is coming to their meetings, whether they need to rearrange or cancel meetings. It’s a real bugbear of mine.
Outlook provides an option that updates the Tracking and automatically moves meeting responses directly to your Deleted folder, unless the sender adds a comment to their email. Unfortunately, when testing this option, we found that Tentative and Declined responses also go directly to your Deleted items which isn’t helpful as they may indicate the need to reschedule your meeting.
Instead, it’s better to create dedicated Outlook rules to handle different types of responses.
An introduction to Outlook Rules
There are several ways to access Outlook Rules:
- From an existing email, right click and select Rules > Create Rule
- On the Outlook Home ribbon, select the dropdown arrow under the Move button and select Rules > Create Rule
- File menu > Manage Rules & Alerts button
Once you have created one or more Rules, you can maintain them using the Rules > Manage Rules & Alerts option and alter their running order.
Rules have three basic steps:
- the conditions you want to check
- what you want to happen next
- whether there are any exceptions (optional)
You may want to watch this video from Microsoft on how to Set up rules.
Create a rule to handle Accepted responses
- In Outlook, go to Create Rule and select the Advanced Options button
- Scroll down until you can add a tick by the uses the form name form option
- Select the ‘form name’ link in the lower pane and use the dropdown to select the Application Forms option.
- Select Accept Meeting Response, select Add to move it to the right hand side > Close > Next
- Add a tick by the move it to the specified folder option
- Select the ‘specified’ link in the lower pane, select New. Give the new folder a name and select where you want to place this new folder (most likely within your Inbox) > OK > OK > Next
- If you require any exceptions to your rule, apply them here > Next
- Finish the rule setup steps 1-3 > Finish
Create a rule to capture Tentative and Declined responses
- In Outlook, go to Create Rule and select the Advanced Options button
- Scroll down until you can add a tick by the uses the form name form option
- Select the ‘form name’ link in the lower pane and use the dropdown to select the Application Forms option.
- Select Decline Meeting Response then hold down your Shift key, scroll down and also select Tentative Meeting Response, select Add to move both forms to the right hand side > Close > Next
- Add a tick by the move it to the specified folder option
- Select the ‘specified’ link in the lower pane, select New. Give the new folder a name and select where you want to place this new folder (most likely within your Inbox) > OK > OK > Next
- If you need any exceptions to your rule, apply them here > Next
- Finish the rule setup steps 1-3 > Finish
Add your newly created folders to your Outlook Favorites
So that you don’t forget to check your newly created folders, make use of the Outlook Favorites functionality.
- In Outlook, locate a relevant folder in the left-hand navigation pane, right click Add to Favorites
- Drag and drop folders so they appear in your desired Favorites position at the top of the left-hand navigation pane
- Tip – Don’t forget to add your Inbox folder to your Favorites.
Looking for more Rules ideas?
Once you get the hang of rules, you will naturally think of other ways to use them. The Internet is full of ideas such as this Microsoft Set up rules article.
Just take it slowly and don’t get carried away.